Memorial Day is the day we remember those fallen in service to our country. Unfortunately for my family, this is also the weekend we buried my mother. She lost her battle with cancer four months after diagnosis. However, I do not want this post to be about how she died, but a remembrance and celebration of how she lived.
You see, in my admittedly biased opinion, my mother was a remarkable woman. She taught us kids that math was a challenge to be met head on. She could learn how to play any musical instrument she picked up in about a week. By the time a plane could get her to a foreign country, she would have learned enough of the local language to get around. She was also the woman who introduced me to crafts.
My earliest crafting memory of my mother, she was sitting at her sewing machine, making a little jumper dress for one of us girls. Most of my youth, she sewed or quilted. My mother always enjoyed sharing her knowledge and love for creative outlets. She taught a quilting class at the local fabric shop and taught me how to crochet.
This foundation, knowing that crafting was a good outlet for your creativity, spurred me to learn how to knit once I got to college. I even poked around until I figured out that the little shuttle in my grandmother's sewing box was for tatting and learned how to use it. Though only knitting translated back to my mother when I went home on vacation.
I knew that she liked to learn new skills, but I didn't fully appreciate the full spectrum of her dabbling until my sister and I helped organize her craft room for her. She had books on basket weaving and paper making. She had leather scraps and stamps for leather working. She had boxes of beads and ended up with a wall full of yarn. She had upholstery fabric and embossing powder. I'm not sure even now we know all of the crafts she tried. I do know that she loved to create and never felt restrained to just the crafts she knew at the time.
When did you first become interested in your craft? Have you tried more than just what you started with?
Wednesday, May 30
Monday, May 14
Dying for Stitches
Long time no see! I took some time off to deal with a family matter. Now I want to dive straight back in because I have lots of yarny goodness to share.
 A few weeks ago, I attended Stitches South in Atlanta, GA. For those who have never heard of it, Stitches is a knitting convention. As you might expect of a convention for people addicted to yarn, there were classes to expand your knowledge, social events because we all love to talk, and a market because *dude* yarn! The meals were excellent. You can see the mini pecan pie we had for dessert the last night. The classes were extremely worth while. As a long time English-style or throwing knitter, I'm trying to remember to practice the Russian continental style I learned. I loved the class where I learned to spin for knitting. I may yet end up adding another craft to my list of hobbies, but for now, I do not need a second stash for fiber. They also offered classes for the non-knitter There were crochet classes and combined knitting and crochet classes. I took the class that explained how to combine knitting and crochet in one piece of seamless fabric. Awesome!
Part of getting ready for Stitches South was to prepare homework and collect supplies before the class so you would be ready for the lesson the teacher had prepared. For example, I had to crochet a granny square to prepare for the combination knit and crochet class so I had a piece of crochet to practice the variety of connection options while in class. One of the classes dictated that you bring wool specifically because of some of the forgiving properties of wool that make it easier to work with when learning a new technique. Some classes also called for yarn of more than one color, hopefully the same yarn weight and fiber mix because a change in size would change your gage, or the size of you stitches. Well, I had a lot of natural wool lying around as a gift/destash from a lady I helped finish an afghan. So, rather than haul 5 different kinds of yarn to Atlanta with me, I decided I would use the Fisherman's Wool for all the classes and dye some of it for my secondary color.
I had never dyed wool before, so I thought I'd look it up. No one seemed to agree on everything. So I followed some of the most common recommendations. First safety rule for anyone thinking of doing this at home. NOTHING that you use for dying can be used to prepare food EVER again. Commercial dyes are BAD for internal consumption. Now that we've gotten the PSA out of the way, here's how I did it.

First, I skeined the yarn so the dye could get to all of it.
(I love my new Amish swift, don't you?)

Then, I let it sit in a room temperature bath of water and white vinegar for an hour. Some people recommended letting it soak overnight, but I didn't allow that much lead time.

Break for food. Mmmm, three kinds of meat and two kinds of cheese. I know there aren't any veggies, but I figure the whole grain bread is healthy, right?

At the end of the hour, the yarn should have bloomed. It will look all swelled up and water logged. This allows the dye to get to all the fibers.

I stove-dyed mine. You heat the water and the dye according to the instructions on the dye container. Then you submerge the yarn in the dye solution. I tried not to agitate the yarn too much because wool agitated in hot water tends to felt. I also dropped in a few cotton handkerchiefs to see how cotton takes the dye. Since I'm one of those people who figure curiosity may have killed the cat, but I'm bigger, I also wanted to see what would happen if I did't do all the elaborate preparation of the yarn. So I wound another skein off the same ball of yarn and threw it straight into the dye pot.

I pulled the yarn and handkerchiefs out of the dye pot and dropped it all in a tub of slightly cooler soapy water. I continued to switch it to cooler and cooler baths until the water was cool to the touch and ran clear of any dye.

This is the wet yarn and the handkerchiefs. As you can see, the wool takes dye much better than cotton. You may also be able to detect a slightly darker shade of red in the hank of yarn at the top. Believe it or not, that was the yarn that I did not prepare, I just threw it in. I'm not sure if it will come out in the wash, but there does not currently seem to be a down side to skipping the elaborate yarn prep.

I then hung the dyed items to dry. Again, the darker yarn, on the left, is the yarn that was not 'properly' prepared. The laundry baskets are set up so the cat does not try to help the process along.

After a few days of hang-drying, I wound the skeins into a pair of center-pull balls. You can see my furry cheering squad in the back.
I wound another 4 center-pull balls of white wool to take along to stitches. This wound up being a bit excessive. One of each, maybe a second ball of white, would have been more than sufficient to complete all the homework and in-class swatches. So now I have lots of yarn prepared to grab for small projects or to try a new stitch. My next post should be mostly about the most recent additions to my stash.
Wednesday, September 21
Blocking
I guess I'll start with the prep steps for blocking. You see, I have never had to block anything before. For those of you who are reading this because I'm writing it rather than because you are actually interested in these crafts, blocking is the process of pinning a piece of fabric, either wet or damp, so that it dries in the desired size and shape. Since I have mostly done scarves and socks, I have never even gotten a blocking board. With the afghan I am working on, I wanted to make sure all the blocks were square and the same size, hence the need for blocking. I didn't really like the current blocking boards available, so I decided to make my own. I know, how weird do you have to be, right?
Well, there were a few characteristics that I really wanted that were not commercially available. I wanted a board that would not adsorb water that might warp it or would have to evaporate back through the fabric. It had to be soft enough to use straight pins, firm enough to hold its shape against the tension of the fabric, and light enough to move about easily. My final requirement was that it possess a one-inch grid so that I did not have to get out a ruler and square every time I wanted to block something. With these thoughts in mind, I went shopping. I found children's foam playmats very inexpensively online. They fit the majority of my requirements. The only thing lacking was the grid, but I figured I could do that myself.


My next post should include joining the squares and maybe I'll be able to report progress on my socks.
Saturday, September 10
Busy, Busy, Busy


So much has been happening this last week. Blocking, winding, knitting, cooking, where to start?
Lets start with the blocking. This was my first time blocking. I wound up making my own blocking boards, which I will cover in more detail in a later post. Since I am blocking wool, I decided to do wet blocking. For those who are reading this because I write it rather than because you are actually interested in all this craft stuff, blocking is when you pin a damp or wet piece of fabric so that it dries to a specific shape and size. It took about one week for me to block all 52 squares once I finished the blocking boards. The next step is to lay the blocks out to decide how to arrange them in the final afghan.
Since blocking is not very labor intensive (set and walk away), I found time to finish the first ball of yarn for my socks and wind the second ball for each. The winding process being greatly facilitated by my mother's willingness to act as a human swift. For some perspective, this is what 618 yards of yarn look like a balls (309 each).
This is what 618 yards of yarn looks like as socks.
I am very glad I decided to invest in a yarn ball winder. This making 3 balls of yarn I've wound on it, each yard cost roughly $0.02 at this point. Having wound more than a few by hand before I got it, I think it was worth every penny. A simple yarn swift may be one of my next investments.
Our garden has also been busy producing lots of fresh vegetables. I must admit, a good number of those veggies don't even make it into the house. A cherry tomato still warm from the sun and fabulously sweet is one of my favorite things about having a garden. This year, we are growing pumpkins for the first time. So, it is our first time trying make pumpkin pie from an actual pumpkin or roasted pumpkin seeds. The pie was my sister's domain, the seeds were mine. The pies came out delicious. The seeds took a little more trial and error. For example, if you are doing seeds in the oven, a little oil goes a long way.
I guess that does it for this week. Until next time!
Saturday, August 27
Delayed Reporting
Last week I hit the 100th row after the heel. Yay! I even went out later that day to get a blizzard with my family to celebrate. Truth, I was the only one who was celebrating my knitting, the family just likes ice cream. This would probably be a more impressive milestone if I remembered how many rows I needed after the heel. Looking at it, it is hard to gage. Probably means I ought to dig out my notes to see what my math said when I started messing with the original pattern. By a strange, meaningless coincidence, my car's odometer flipped to 40,000 earlier in the week.
Other news I am happy to report is the first floral display from my mother's african violet since moving into my office's window sill. The flowers are daintier than the ones on my african violet that has yet to bloom since I moved. Maybe it would be happier in my office, too.
We are also dealing with all the excitement Mother Nature decided to deal the north eastern coast recently. The earthquake shattered my nerves, but no permanent damage to either my home or office. Now we are battening down the hatches for Irene's visit this weekend. I'll post again next week with my hurricane progress on the socks.
Sunday, July 10
Preservation from the Garden
 |
| Before |
 |
| After |
Friday, July 1
Progress
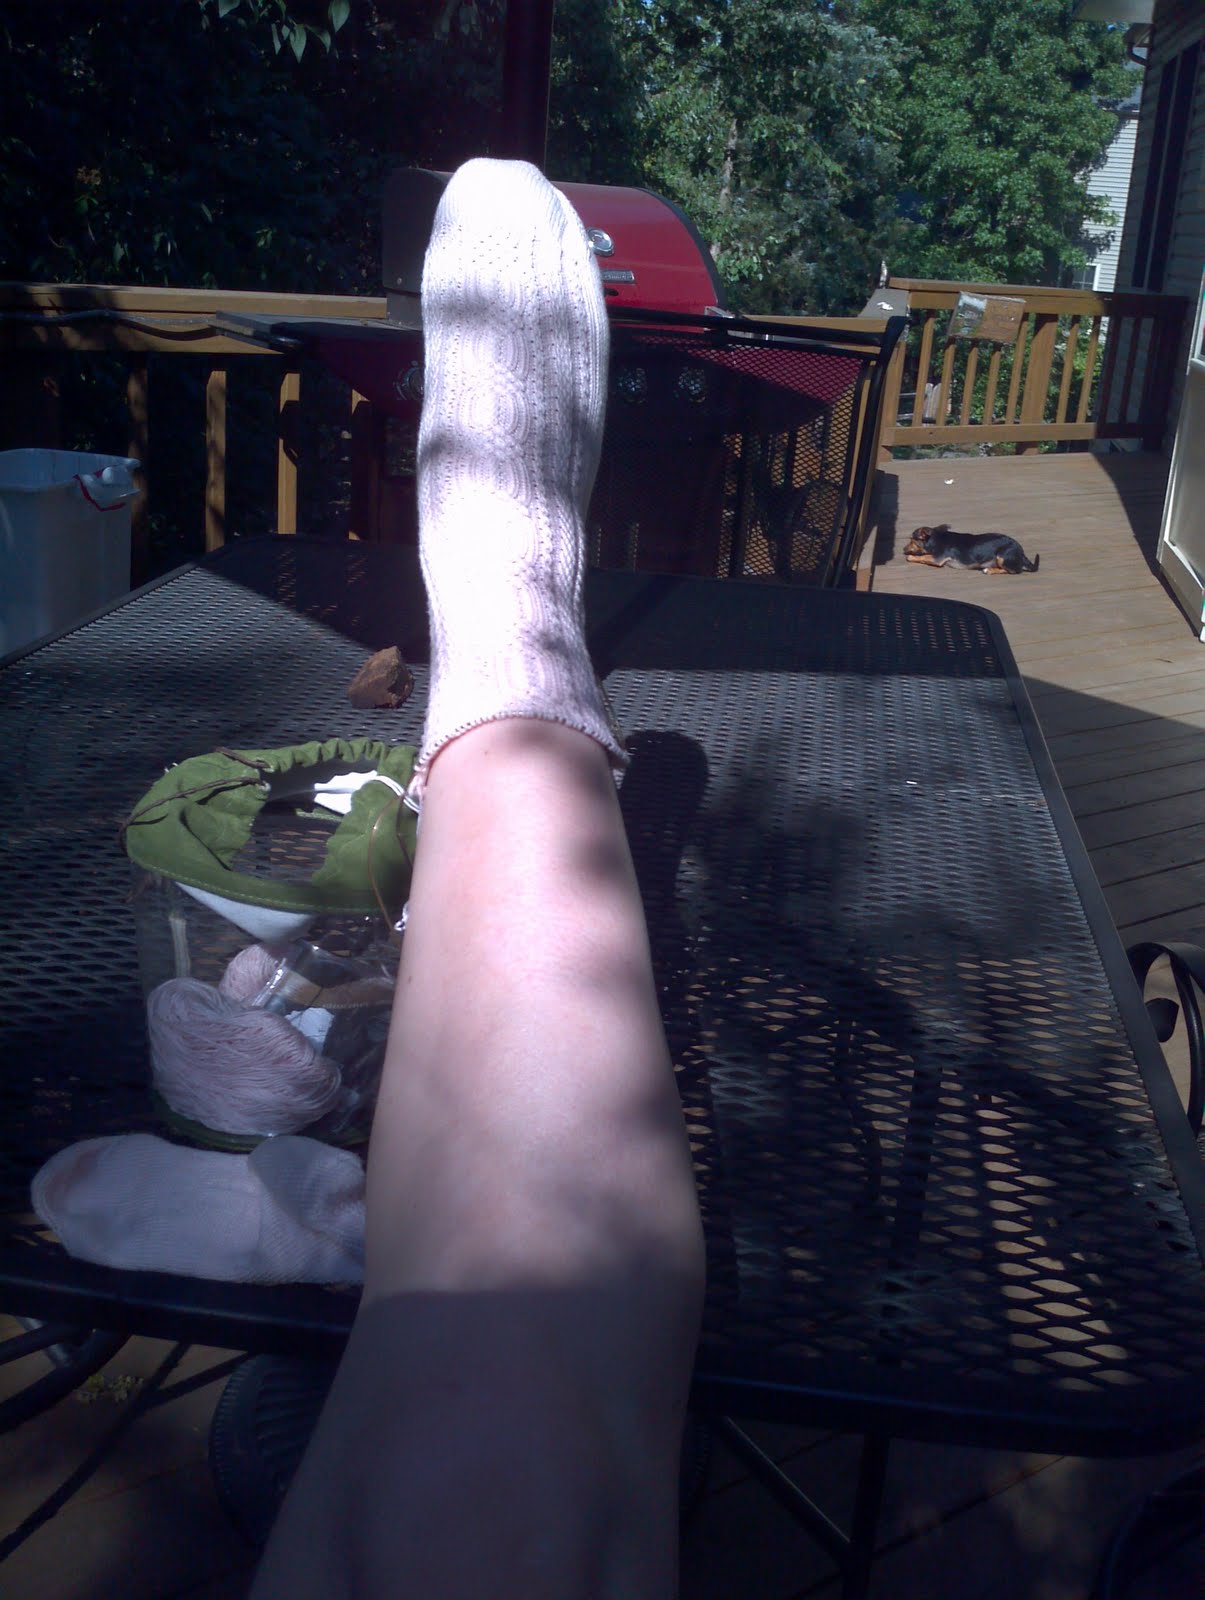
Some of you may have noticed Udvar sunning himself in the background. This is in part because he loves lying in the sun and in part because he is all wet. You see he had his first bath today. I wa not the only one involved in this process. My sister gave me her old dog shampoo, my younger brother helped with judicious application of bacon and my folks contributed the VERY deep sink. Helpful since Udvar doesn't like getting wet. However, quality time in the sun has dried him off sufficiently for me to consider puppy cuddle time while I try to make progress on my socks. Until next time!
Subscribe to:
Posts (Atom)